

Showing posts with label tutorial. Show all posts

Tuesday, March 16, 2010

Smocking

Well, I'm still plugging along with my soft sculpture, the plans have changed so much that I decided to just go for it and start her face. I got impatient waiting for the eyes to arrive in the mail and maybe that wasn't a bad thing since the eyes wouldn't work anyway, they are too big. Anyhow, I'm sort of sticking to the pattern except the attire is not part of the deal, the author fancied her doll in a pretty smocked dress she'd made for her granddaughter and causally stated a vintage dress can be located at a local thrift store. Nah, least I can't locate a cute little girly gown. So with that in mind...I decided to make my own custom smocked dress. It sound much more difficult than it is but it's really kind of simple. Using a straight edge you mark a series of dots on the back of your fabric, be careful to measure spacing, both vertical and horizontal.

Using the same color thread as the garment, you do a running stitch with long and shorts, the short will be under the dots.

Usually you will need a even amount of rows but it doesn't really matter, the only time it would be a problem is if you smock with a certain amount of rows on your pattern. I've used six rows here.

When all your rows are evenly stitched you will have to grasp the ending threads in one hand and using the same amount of tension on each thread, pull, gathering each row at the same time.
I actually ironed my pleats because for me, it makes the last step easier. The smocking.

I picked the outline stitch because it's the most simplest to sew. Basically it's looping over 2 pleats, reversing on the backside to stitch up thru one pleat, coming out under your loop, repeat. It's really easy and although all your fingers need to be doing something all at one time, it's worth it but a bit cumbersome.

My fabric is a rust color although on my monitor it looks orange. C&G Design


Words and photos by Dawn,

C&G Design.

Friday, September 18, 2009

pumpkin patch


Okay, I had another one of those days where a quick, away from the sewing machine, project just had to be done. I had this idea..... and a orange remnant, perfect for pumpkins. Using the stool seat as a guide I made 2 twenty inch circles.


A 3 inch round piece of wood with a hole in the center for the straightened hanger I was using.
Glue to the center, wrong side of the fabric.


I gathered the edge of the fabric, not being worried about turning under a hem as the edge won't be seen. Pull thread to tighten around the wire, close enough to allow for a stem to be glue to the hanger. Stuff pumpkin as you go.


Okay....stop. Right now is the reason why I make two crafts at a time. I placed both fabric circles together before cutting, I choose a block of wood I knew would act as a stand, but when it came to the length of the hanger, well that needed cutting once the pumpkin was done and stuffed. I had no idea what size of a pumpkin a 20'' circle would make so I had to deal with the cumbersome end of my wire. Turned out to be 15 inches. Cut a 3'' x 16'' strip of green felt, glue to wire and wrap, gluing as you go. Glue edge of pumpkin to stem.


I truly, truly have NO idea what I'm going to do until it's done. Brainstorming I came up with two drawings, I'd have to make a felt wing for the crow.


Using floral wire I made curly vines out from the top of my pumpkin, later I will cut felt leaves and glue them in strategic places, holding the wire for stability.


I topped my hanger with my stuffed crow, I didn't need to cut a felt wing because I thought the netting would be better. By now I'm smiling to myself because my project is taking shape and it's cute! Stripped paper for a nest worked well also.


My second pumpkin took no time, I had everything cut and ready before I started and that's most of the work.


The witch has a netted cape and a stripped paper broom from a twig. I left one side without wire because I intended to make a Jack-O-Lantern but then I became hesitate. Do you think it needs one? And if so, what kind?


I love this orange fabric, take it from me, it's a cute pumpkin patch.


This set is headed for Etsy, answer my question as if you would buy it. C&G Design.


Monday, August 10, 2009

Bottle Brush Trees

Yesterday I focused on my Santa helpers, today I will talk alittle about bottle brush trees.

Nearest I can tell this little ornament originates from the 1930' s to the 1940's and are sometimes referred to as "teacup trees" Made with boar bristles or horsehair, they are considered, (least by me) our first "fake tree". The red tree pictured above is a classic vintage sample, bottle brush wreaths were also quite popular 60 to 70 years ago.
Recognized for it's realistic look around mini train sets, it was also, and still is, a mainstay for the Christmas villages.

See Sarah for a tutorial on these trick or treat trees.

Special shout out for my sister today! C&G Design

Sunday, July 26, 2009

Easy Peasy Photo Album Covers

I am a good one to look at handmade things and try to figure out how they are made, I did not have to spent too much time on these covers though, they are easy peasy.1. You start by having your album handy, see...I can't tell you the fabric to cut, or the outside dimensions because every binder is different. You're going to need to measure around the outside of the album with the album closed, a cloth tape would work. Add about 3/4'' for seam allowance and space for batting. Cut the inner cover times 2 at the dimension of 12 1/2 by 12 1/2. place fabrics right side together. You can also add lace around the edges but I would recommend pre-gathered because it's easier to round the corners. You can go all the way around the outside edge with your lace, but I do the top only a lot of the times, it cuts down on the fru-fru- being placed on a shelf.
2. Get the hot glue gun handy and glue batting around the outside of the album, the covers fit better when they have a cushion applied under it.

3. Measure you album by placing the cover on it with the batting, pin where the binding starts, you will sew another piece of lace to make a complete square. On the binders edge, stitched to the right side of the fabric, make sure ends match-up.


4. Cut the frame size you want from cardboard. Glue a small amount of batting to one side of the frame.

5. Hot glue the fabric wrapped around the frame, pleat the corners in one triangle tuck.

6. Hot glue three sides of the frame to the album cover (leave upper side open for photo to slide in). Embellish with what you'd like, ribbon, silk flowers, buttons, etc.
Easy peasy. C&G Design

Wednesday, May 6, 2009

Free Tutorial on making Annie

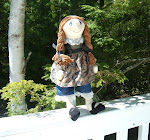
This little lady is a cutie, she can be found at Bowls-n-Annies by De as a free tutorial on How to Make a Primitive Doll. C&G Design