








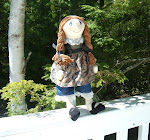
My plaster doll has certainly been a challenge, I didn't want her to look like she had when I attempted her painting in high school. I've looked at many portraits to decide how I was going to proceed. I took my time while in the quiet of the day.
 She is forming personality, one of which I'm happy with.
 I glued half beads for the pupils, I think it works for adding a depth to her eyes. Two coats of varnish.
 A few more curls on the side of her face and, ta-da! Another project off the list.
 Here she is with just the clothing.
 From the back....I made her coat with a flair to conceal those hips! Next time I'm going to indent the upper legs so this won't happen.
 Remember I said I wanted a bag lady type doll? Well, off we went to make a satchel. To carry what, I don't know, I never know.

Some accessories, some jewelry,

A cute brooch. She didn't look like the bag lady on the street,

but, I felt she had a eccentric way about her.

I knew she had to look as if she were shopping and taking some kind of pet with her. I have several animals stowed in my stash, birds.....birds would be right up her alley.
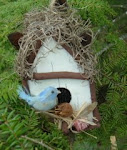
 Some glass birds glued in her wild hair-doo! She doesn't know they are there.

I call her Bree, The Bird Lady....

Now, to find a permanent spot for her.
 She is moving....I'm afraid her birds will take flight from here and I'll never see her again. C&G Design
 I took my time while in the quiet of the day.
 She is forming personality, one of which I'm happy with.
 I glued half beads for the pupils, I think it works for adding a depth to her eyes. Two coats of varnish.
 A few more curls on the side of her face and, ta-da! Another project off the list.
 Here she is with just the clothing.
 From the back....I made her coat with a flair to conceal those hips! Next time I'm going to indent the upper legs so this won't happen.
 Remember I said I wanted a bag lady type doll? Well, off we went to make a satchel. To carry what, I don't know, I never know.
Some accessories, some jewelry,

A cute brooch. She didn't look like the bag lady on the street,

but, I felt she had a eccentric way about her.

I knew she had to look as if she were shopping and taking some kind of pet with her. I have several animals stowed in my stash, birds.....birds would be right up her alley.
Some glass birds glued in her wild hair-doo! She doesn't know they are there.I call her Bree, The Bird Lady....

Now, to find a permanent spot for her.
 She is moving....I'm afraid her birds will take flight from here and I'll never see her again. C&G Design


