


Long day in the studio again. I'm so into getting my space organized.....there is no stopping even for lunch!
Anyway, I'm relying on a saved post. I had hoped to have it for a soft sculpture or Christmas but now is a better time than any. Enjoy.
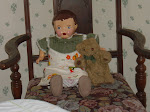
Lisa Juris of Day Dream Weaver Dolls

Materials needed:
Iron
Freezer paper
2 tiny black seed beads for eyes
flesh colored fabric for body and arms ( I prefer velour)
Christmas print for jacket and scarf
(a fat quarter ought to do it for both jacket and scarf)
3-inch piece of flesh nylon sculpting skin for head
tacky glue
3-inches of wire gold or silver
stuffing
sculpting needle
2 quarter inch buttons
matching thread
mohair (white)
Small piece of interfacing
Black permanent marker
Tweezers,forceps, or whatever you use to turn tiny doll parts
Knitting needle or chopstick
Body:
Trace body piece onto freezer paper, cut out, iron onto wrong side of flesh. This is a template, so you will need to sew before cutting out. Make sure to leave an opening for stuffing. Turn right side out and stuff firmly. Whipstitch opening closed and lay aside.
Arms:
Trace the arm template onto freezer paper, cut out, iron to wrong side of fabric,
Sew, and then cut out. Stuff the arms firmly and whipstitch the openings closed. The middle finger of the arms does not always come out as far as the other two fingers. Don't worry about that part. Now that you have the arms and body ready, take the two buttons and start by sewing them on the outside of each arm, I like to secure mine really tight before attaching them to the body. Once you have the button as tight as you want on the first arm, start sewing it to the body taking many stitches in and out of the button. Next, attach the other arm repeating the same steps. Once the arms are on, keep taking stitches back and forth through the button- holes and the body. Once it is secure tie off.
Jacket:
Trace the jacket piece on to freezer paper, iron onto a folded piece of fabric, I prefer a bright Christmas color, it is scrooge after all. You want to cut out two on folded fabric.
Next, turn the two pieces right sides together, pin and sew using a quarter inch seam. Do Not finish the neck line. This jacket will be pulled over the body, so do not worry about leaving an opening.
Scarf:
Cut a 6-inch by 3-inch strip of the print you used for the jacket. Sew down the long end of the fabric. Turn right side out, and use your pinking shears to cut the ends, so they do not ravel. Lay this aside for later.
Dressing the doll:
Make sure that you dress Scrooge before you attach the head. The sleeves will be a tight fit, but I guarantee that the jacket will fit. Just be gentle and keep pulling the arms. I used a long 12-inch pair of tweezers that I bought at a doll show last year. Keep pulling until you have the hands through the sleeve opening. Adjust the seams so the jacket lies straight.
Head:
The head is made of a 3-inch piece of flesh colored nylon fabric. Tie off the top, stuff semi-firmly and take a gathering stitch around the bottom. Push onto the neck and tighten the circle, taking stitches in and out of the neck to secure the head onto the body. Face:
Face:
Now comes the fun part. Take your sculpting needle and matching
Start at the back of the head, take a small stitch indenting where you will be placing the eyes, repeat for the other eye. Tie off and clip in the back. Glue the little black seed beads in the eye holes. Next you will sculpt the face. Working with nylon is easiest to achieve the affect of an old wrinkled man. You want him to be grouchy looking and my tip is to just keep making stitches until he looks the way you want him to. When you are doing his nose. Start next to the eye, and making long stitches down the side, until you achieve a long nose. Make indentations on each side of the head until you have shaped his face to your desire. Make a stitch under the nose to make the illusion of the mouth, and a wrinkled chin underneath.
Hair, scarf, sign and glasses:
Now you can tie the scarf around his neck, glue patches of mohair on his head. I pulled the hair apart until it was kind of fuzzy. The take your wire and make a small pair of glasses. This is where your knitting needle or chopstick comes in handy, use it to shape the lenses around, so that you have perfect circles. Position them the way you want and glue them in place. Last, glue your Bah Humbug! Sign to each hand, using a straight pin to hold it overnight while the glue dries. You can either attach a thread to his head to hang on your Christmas tree, or attach a pin back and wear him through the holidays. Enjoy.

7 comments:
She looks great! I went flea marketing yesterday and I was telling my friend and the Jimster how you collect dolls. My friend's daughter purchased a porcelain doll for like $3. Very nice too. I told her to look for the maker.
What a cutie. She will travel.
Wish I had the patience to make something like that. I just don't. Your studio is coming along great. Love your ribbon rack, and all the cubbies. I love that the walls are papered with sewing patterns. What a fabulous idea!
Love, Kathleen
This is the perfect doll for my Saint if he played with dolls.LOL I call him my Scrooge at Christmas as he does not care for holidays that much...
Love her but would never ever have the patience to even attempt something like her.
I had a professor that looked just like that--of course he never held a sign. You do wonderful work.
Marnie
Checking in, caught up. Love the ribbon spool holder! Busy trying to figure things out here...travel, guests, selling (ha! ha! not yet) the house, where to live, etc. It is HOT!!! (no air conditioning here)
Post a Comment